|
PowerPoint
2002 Read
over your rubrics (self-evaluation) for this task before you
complete the activities. Click on the arrow and use the BACK button
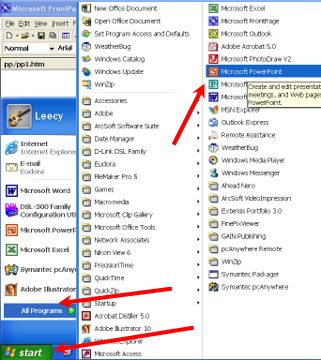
on your browser to return to this page and continue. PowerPoint (PP) is a handy presentation tool. It helps you present information with images, text and sound. You can even have your presentation run automatically! Before you continue, click on the arrow to watch a Power Point presentation. In this Webtask, you will create a short presentation. You will introduce yourself and describe your interests and plans. Each "page" in Power Point is called a SLIDE. You will create a presentation with three slides: a TITLE slide, an INTERESTS slide, and a PLANS slide. To open Power Point, go to your START button, select PROGRAMS and then Microsoft Power Point.
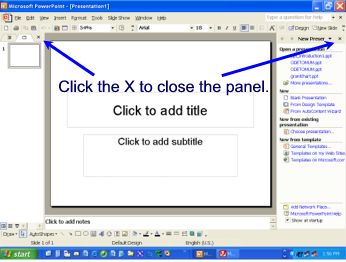
When you select the Power Point (PP) line, a window or screen will open. If you see a panel on the left and on the right of the slide, close each one by clicking on the X at the top of each panel. [Click on the image below to see a larger image. Continue to do this as you go through the instructions. The smaller images are called Thumbnails. They save space. When you want to open the thumbnail images, just click on them. Use the BACK button on the browser to return to this page]
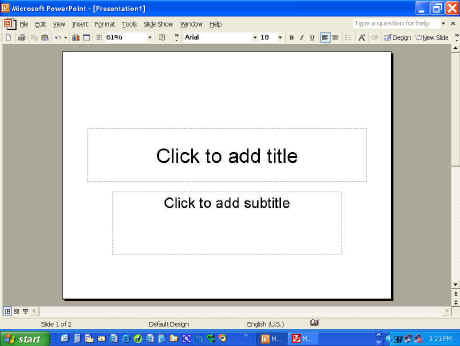
A blank presentation will open with the first slide, called a Title Slide. Your screen should look something like the image below. [Click on the image to enlarge it.]
Activity 1 A. The title slide layout (structure or appearance) gives you two text boxes. These boxes do not appear when you show your presentation. They are there so that you can place text in them The top box, with bigger text, is for your title. The lower box is for your sub-title. Read two examples of title and subtitles below: Cars My
Family B. Left-click in the top box. Write your name in the big title box. Write "My Interests and Plans" in the smaller, sub-title box. Example:
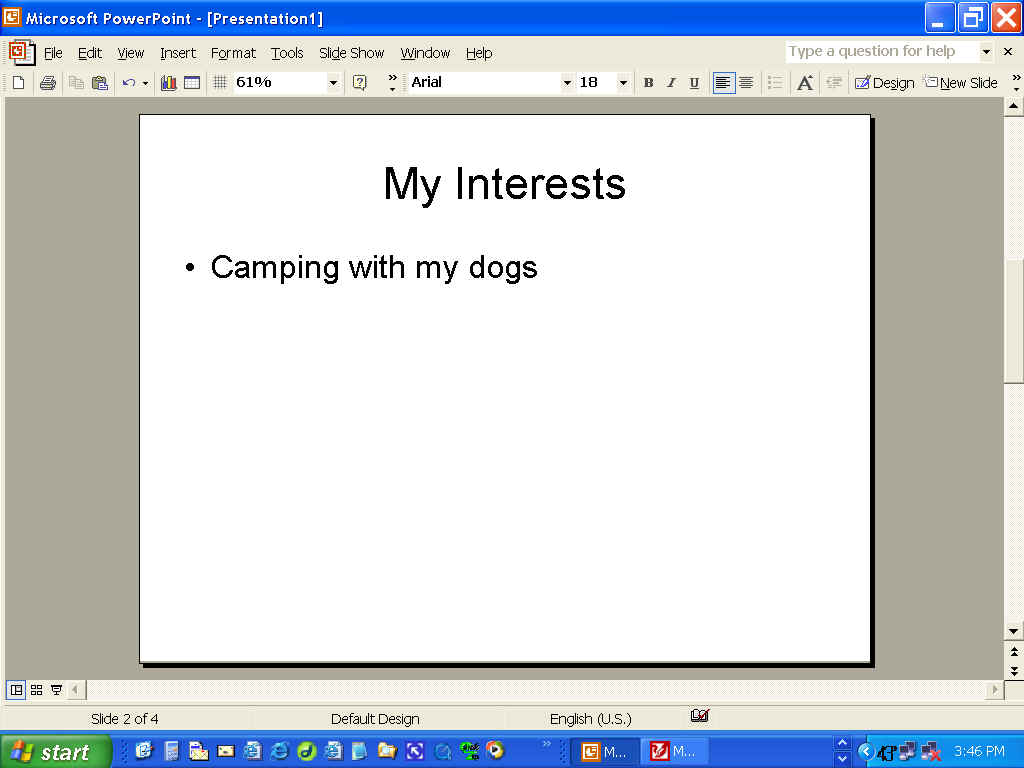
C. Save your presentation as "yourinitialspp1.ppt:" For example, Jennifer Cline would save her presentation as "jcpp1.ppt." Ask for help if you need it! Be sure to notice where you save your presentation on your computer. D. After you save your presentation for the first time, you can keep saving it in the same location by typing CONTROL+S (hold the Control key while you type the S). Save your work often! Okay! Now you are ready to add a second slide to your presentation. However, you already have a title page. Now you want to add a Title and Text slide layout. Click on the icon (image) on your toolbar that says "New Slide." A panel will open on the right, showing you different layouts. The Title and Text layout is automatically selected. In this layout, you will type a Heading for the slide in the top box. [NOTE: if you want to close the panel, click on the little X at the top of the panel (NOT the window!)] SAVE YOUR WORK! Activity 2 Left-click in the top box, write My Interests as the heading.
Now you are ready to list a few of your interests. Think about things you like to do. Click the space next to the first bullet (round icon) and write your first interest. Look at the example below.
When you finish writing your first line, press ENTER on your keyboard and another bullet will appear. Repeat the process until you have written five interests.
SAVE YOUR WORK! Great! Now you are ready to create your next slide. Follow the same steps you did before to open a new Title and Text slide. Activity 3 - One-Year Plans Type My Plans as the heading for that slide. To list your plans, write five statements as your did in the previous slide. Think of your plans for one year from today. What do you plan to accomplish (complete or achieve) by the end of another year? Each line should state one plan you have for your life.
SAVE YOUR WORK! You have now completed all of your slides for this task. You will add more items in your next task. Now you are ready to work on the appearance of your slides. Later, you will create things from scratch. This time, we will use a TEMPLATE, which is a group of colors, text and other items that you can add automatically to your slides. Activity 4 The double arrows at the bottom right hand of your screen take you from one slide to another. Click twice on the Up-Arrows to go back to your first slide, the Title Slide.
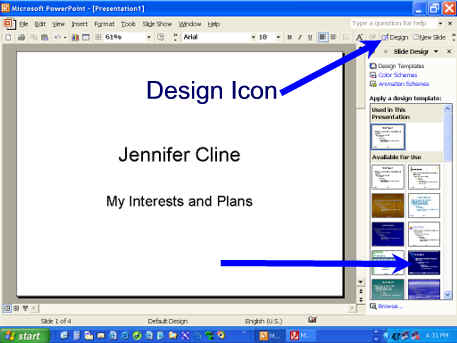
When you return to your Title Slide, click on the icon that says DESIGN. A panel will open showing you a list of template to choose from. Click on different templates and notice how they change the look of your presentation! I chose the blue background in the example below for Jennifer Cline.
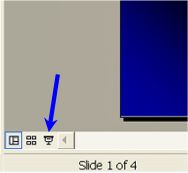
When you find a template you like, save your work. Now, you are ready to play or present your presentation! Activity 5 Look for the little icon on the lower left part of your screen that looks like a projector screen (below). That is called the Slide Show icon. Click on the icon. Your first slide will cover your computer screen.
To move ahead to the next slide, either left-click anywhere on the screen or use your left arrow key. When the last slide plays, press the ESCape key on your keyboard to return to your working screen. Activity 6 Next to the Slide Show icon is the Slide Sorter iconon the lower left part of your screen. It has four little squares next to each other. Click on the Slide Sorter icon. You will be shown all three slides in your show together.
Now go to the File selection on your menu bar (top left). Scroll down and select PRINT. Print the page with your three slides showing. Sign and date the printed copy and place it in your portfolio. In the next few tasks, you will work with other tools in the program. GO
TO READING ACTIVITY GO
TO MATH ACTIVITY Complete
the Rubrics, print and date the Rubrics page, and place it in your
folder. Congratulations! You've learned something new today!!! |
|